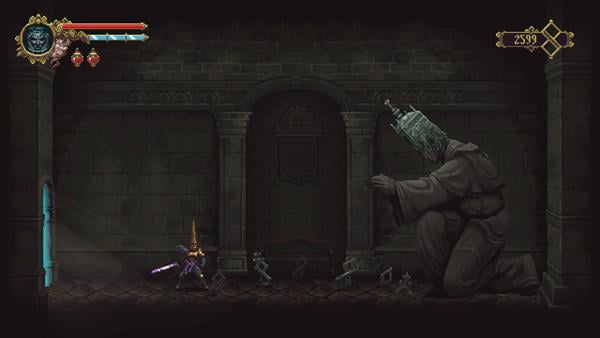
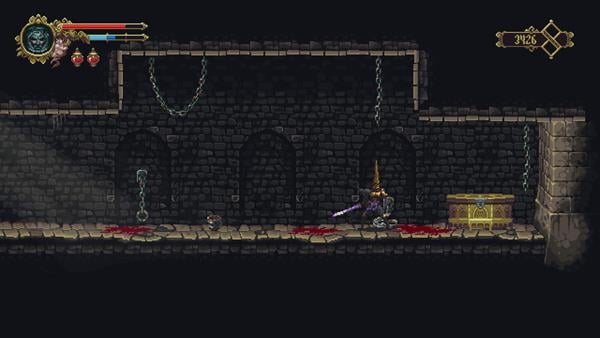
Mercy Dreams is a Location in Blasphemous accessed from the Wasteland of the Buried Churches and found in the Suburbs.

General Information
- Previous: Wasteland of the Buried Churches
- Next: Desecrated Cistern
- Bosses: Ten Piedad
Video Walkthrough
[video goes here]
Map
[map goes here]
NPCs in the area
Bosses
Items
Collectibles
- Maxilla of Tarradax, the Cleric
- Pisiform of Hernandez, the Explorer
- Cervical Vertebra of Zicher, the Brewmaster
Equipment & Magic
Key/Quest Items
Enemies
Full Mercy Dreams Walkthrough
Mercy Dreams appears to be an old prison that is filled with traps and mechanisms that seems to be used on prisoners for torturing.
First Section

Upon entering the old prison, you'll find a door to your right which is a Confessor Statue. You can interact with the statue if you want to remove your guilt, however, you'll need to pay with Tears of Atonement. If you don't need to interact with the statue, leave and go down until you reach the section that has a door to your left and right.

Go to the door that's on your left first to find this location's first Prie Dieu altar, replenish your health and flasks and save your game - when you're done, head back outside and enter the door that's on the right side. Once you're in the next section, be mindful of the ground that has blood on it, there are spikes that spring out of the floor, you'll also encounter the first enemy of the location Acolyte.

Continue to your right and jump onto the wooden platform where you'll find a bronze chalice, hit the wall with your destroy a secret wall. You'll encounter a Flagellant and also obtain a Collectible item, Maxilla of Tarradax, the Cleric - continue your exploration and go down the ladder where you'll encounter x2 Acolyte.

Once you reach the lower area, you'll have to pass through 3 sets of spikes before getting through. Simply slide, duck, then slide again to avoid getting hit. If you want to farm Tears of Atonement, then jump down to the bottom where you'll encounter x2 of Acolyte and Flagellant. But if you want to avoid battle, you can just jump onto the platforms and use it to get to the other side, just be careful of the spikes that come out of the platforms.
Second Section

Upon reaching the next section, climb up first and flip the switch to unlock the gate ahead which opens up a shortcut near the Prie Dieu altar - if you need to use the Prie Dieu altar, rest at it before you move to the next section. Continue going down from the Prie Dieu altar then head to the door that's on the right. You'll find yourself in the prison's next section.

A new enemy will be in this section, which is x2 Wraith alongside an Acolyte. If ever the Acolyte blocks your path, use your prayer Verdiales of the Forsaken Hamlet so that you can kill it from afar. The Wraith are quite easy to kill, and attacking them interrupts their attack. Continue going to the right side where you'll encounter two more Wraith until you reach the end with a ladder - climb down the ladder, and slide down at the right time to avoid getting hit by the energy ball. You can slide down the ladder by pressing the down button and the jump button at the same time - once you've made it to the end of the ladder, jump to the right side and enter the room where you'll find a golden coffin.

Open it to acquire another Prayers: Seguiriya to your Eyes like Stars. When you open the coffin, the gate behind you will close and you'll be ambushed by x4 Wraith. Kill all of it to re-open the gate - you can equip and try the new prayer which grants The Penitent One an attack speed for a short period of time.

Once you've dealt with it, head back outside and continue to your left towards the next section. You'll encounter a new enemy which is a Spear of the Cathedra alongside a Flagellant. You can easily interrupt its attack if you strike first before it lunges its spear above of The Penitent One.

Now, continue left, then climb onto the ladder. You can easily free the trapped Moonlight Child by jumping at the right time then striking it with the sword. After that's done, climb back to the ladder and jump onto the wooden platform that's on the right where the Acolyte is. Kill it then continue going to the right where you'll find another collectible item: Cervical Vertebra of Zicher, the Brewmaster - after acquiring the item, head inside the door that's on the left to enter the next section.

You'll now find yourself at the lower section of the flight of stairs, make sure to flip the switch first before going down to open up a shortcut. On the left side on the wooden platform is an illusory wall. Behind is a room, there you'll find the "Small Bead of Red Wax".
Third Section

Make your way to the bottom level until you encounter x2 Wraith that's by the ladder. Be careful since it will start to shoot out its projectiles once you climb down the ladder. Once you've cleared the area, enter the room that's on the left and go inside the opening that's on the wall to find Candelaria's shop.

Candelaria is the merchant of the game and she can be found in multiple locations where she sells various items. This is where you'll first find her where she sells the following:
- Key to the Chamber of the Eldest Brother -
 400
400 - Hollow Pearl -
 1000
1000 - Moss Preserved in Glass -
 1500
1500
*Try to buy the key first so that you can open the locked door at the Brotherhood of Silent Sorrow. When you're done buying the items you need, head back outside to where the x2 Wraith was and enter the door that's on the right side to enter the find the next section of the prison.

Now, from here, you'll want to be careful since there are multiple traps here. First are the spikes that will spring out of the walls once you climb down the ladder, if you're not careful enough, The Penitent One will get hit and he'll fall down to the ground and most likely get hit by the energy ball or another set of spikes that are on the ground. After you've climbed down the ladder, go right and avoid the energy ball and spikes that are on the ground. You'll have to dash then duck to avoid getting hit by the traps - at the end, you'll find another ladder which you'll need to climb to reach the top.

At the top, it'll be the same set of traps, a mechanism shooting an energy ball and a set of spikes which are now springing out from the ceiling, this time you'll need to jump then duck or dash to avoid getting hit - at the end of it, there's another ladder you'll find that you need to climb up. When you reach the top there will be x2 Flagellant patrolling the area and a mechanism shooting the energy balls, so try not to jump to avoid getting hit by it. Continue going to the right while facing more enemies.

Eventually, you'll come across wooden platforms that you can jump down to and x2 Flagellant. You can easily kill them from afar by using Verdiales of the Forsaken Hamlet, once the path is clear, climb down the ladder and walk up to the wall that's next to the golden chalice, strike it to reveal a secret room - climb down the ladder to enter another section of the prison.

From here, you'll encounter a couple of enemies roaming around the said section. Simply fight your way through and at the end, you'll find an Empty Bile Vessel - after acquiring the item, head back to the previous section and continue to the path that's on the right.

Here, you'll meet another NPC named Viridiana for the first time. She mentions that she watches over The Penitent One and can offer her assistance against your next task, if you choose "Assent" she will appear and aid you in a boss battle, choose Assent so that it progresses her own side quest.

After speaking to her, head down where you'll find a Prie Dieu altar. The path to your right will take you to a room where you'll find a portal which you can use to fast travel to Albero and also another collectible which is Pisiform of Hernandez, the Explorer; while the door that's on your left is where the next boss awaits - once you're ready, head inside the room that's on your left.

Proceed forward and you'll trigger a short scene where before the battle against Ten Piedad starts.
Boss Battle: Ten Piedad

Ten Piedad's attacks consist of AoE attacks where it constantly tries to use heavy attacks to keep you away from it and by growing out vines from the ground. The best tactic to kill this creature is to try to close in the distance and parry or block most of its attacks. There are only two attacks which cannot be parried which is the Swipe attack where it bends over and swings its arm and the Stomp attack where it raises one leg and stomps onto the ground which knocks you back if you block it then follows up with vines the spring from the ground at your last location.
Ten Piedad does have a second phase but there aren't any changes or animation to it. But instead, once it reaches 50% and even less of its health, Ten Piedad gains the ability to telegraph more vines for about 3-4 more that spring out from the ground which allows it to cover a larger area of the arena. Block, dash, jump over the vines to avoid getting hit and try to get close to the creature in order to land your attacks, to learn more about this boss, click here - you'll be rewarded with ![]() 625 and unlocks the Trophy/Achievement: No Mercy upon defeating the boss.
625 and unlocks the Trophy/Achievement: No Mercy upon defeating the boss.

After the battle, the gates and door that's on your left will open and you'll come across a room where you'll find a body of a Holy Guardian. Approach it and you'll enter a dream state where you'll find its true form, listen to it and it'll provide you with the Holy Wound of Attrition - once you've returned from the dream, continue to your left where you'll now enter the next location, Desecrated Cistern.
Video
[video goes here]
Map
[map goes here]
Trivia & Notes:
Use the opportunity to fast travel to Albero and use the Key to the Chamber of the Eldest Brother to open the locked door at the Brotherhood of the Silent Sorrow so that you can obtain the Blood Perpetuated in Sand relic which can be used to transform red motes into platforms.
 Anonymous
I think this guide is outdated. Some of the stuff is different from the game

 Anonymous
You missed the small bead of red wax in the second section of this area it’s in a hidden wall main area going down.

This guide is missing a secret passage above the entrance to Candelária's shop.
Just attack left wall before going down the ladder with two Wraiths
 Anonymous

Uhm, should include that the portal to Albero leads to a room with the Thyme, and that the Penitent One should give the Thyme to the Kissers of Wounds.
0
+10
-1