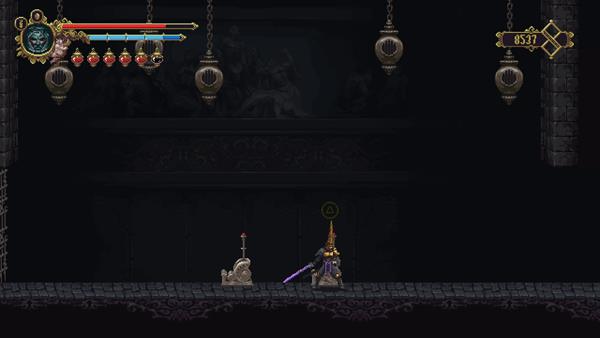
Jondo is a Location in Blasphemous. Jondo is a dark and gray area that is located in between the Mountains of the Endless Dusk and Grievance Ascends. Please see Walkthrough for other areas.

General Information
- Previous: Mountains of the Endless Dusk
- Next: Grievance Ascends
- Bosses: n/a
Video Walkthrough
[video goes here]
Map
[map goes here]
NPCs in the area
Bosses
- n/a
Items
Collectibles
Equipment & Magic
Quest Items
Enemies
Full Jondo Walkthrough
The Ringing Bells

Upon arriving in Jondo, you'll notice a bell to your right, if you observe it, you'll see that there's someone ringing it which sends out a shockwave that inflicts damage upon contact. Climb down the ladder and go all the way to the bottom area where you'll encounter Flagellant and Winged Face enemies. Go to the left and you'll see a woman ringing a bell, kill her to stop the shockwaves - after killing her, continue going left and climb up where you'll find a switch, pull it to activate the moving platforms that are in the room, now, go back around, go to the middle part of the room first to find a Collectible: Scapula of Carlos, the Executioner, and hop onto the moving platforms until you reach the next section.

For the next section, drop down, then go to the middle part where you'll see the bells and some ladders, you'll find the woman ringing the bell just below it alongside x2 Flagellant. Once you've killed the woman, climb and jump across the ladders towards the Winged Face enemies, there's a Prie Dieu altar above, so make sure to activate it first before you continue.

After you've used the Prie Dieu, go back down, continue going left until you reach the end, and then drop down into the bottom where you'll encounter a Sagittal Martyr, kill it, then hit the bell to release a shockwave that will activate the switch that's next to it, this will unlock the gate ahead of you - keep going right where you'll have to cross over a bed of spikes by using the unstable platforms, once you reach the end, climb up first and pull the lever to activate the moving platform, then jump back down and climb down the ladder to enter the next section.
The Bound Bell

Upon arriving, go left and you'll find a statue of three men that seems to be reaching the bell that's above it. The goal here is to look for two statues that are holding the chains that are seen bound to a bell as shown in the background. Continue going left and you'll encounter x2 Sagittal Martyr that are standing on the moving platforms while x2 Flagellant that are roaming on each concrete pavement, be careful not to fall down the moving platforms since there's a bed of spikes underneath - simply head to the bottom part then climb down the ladder to enter the next section.

For this section, you'll immediately see another Sagittal Martyr on your left and a moving platform that goes up and down in the middle. This room is quite tricky since the Sagittal Martyr will start to throw its weapon once you are within its range, it can also get quite annoying since getting hit knocks you back and inflicts damage, and if you're unlucky, you can be thrown off the edge and fall down on another bed of spikes that's on the bottom. Luckily, you can deflect its weapon back and you'll have a brief opening before it starts to throw its weapon again.

Just take your time until you reach the bottom, while you continue going down you'll encounter about four more of this enemy that are positioned on each side, on the lower moving platform you'll find a gap which you can slide into to obtain another Collectible: Vertebra of John, the Gambler - after obtaining the item, go back, climb down the ladder, and go left into the next part of the area.

Next, you'll find yourself in a room where you'll need to reach the top while avoiding the shockwaves from the bells, climb to the top and you'll find the woman ringing the bell. After killing her, jump and hit the wall to the right so that you can drop onto the unstable platform, then quickly jump to the left to obtain another Empty Bile Vessel, jump back onto the unstable platform, wait for it to break and you'll land on another unstable platform, quickly jump to your left where you'll find a switch, pull it and the metal platform that's below will start to go up - ride it, and when you're at the top, jump and cling onto the wall to reach the topmost part of this room.

Before climbing up the ladder, go inside the room to your left to find a fountain which you can use to fill up the Empty Bile Vessel you just got, after that's done, head back outside and climb up the ladder to enter the next section.

In this room, you'll find the statue that's holding one of the chains. Be careful going around this room since there are a couple of enemies, the woman ringing the bell can be found in the middle of the room standing on a metal platform and is being guarded by the Sagittal Martyr enemy, while Winged Face and Flagellant enemies are roaming around. Kill the woman ringing the bell first, then the Sagittal Martyr, then the rest.

You'll notice that the gate ahead is locked and there's a bell that is moving horizontally, at the right time, hit it to emit a shockwave that can hit the switch below it, this unlocks the gate ahead of you so that you can reach the statue that's at the top - before you climb up the broken ladder, jump to your left and go inside the room where you'll encounter a puzzle.
Puzzle: Ring the Bells

In this room, you'll find five bells hanging on the ceiling and two switches in the middle. The goal is to create a domino effect of shockwaves so that it can hit the switch that unlocks the gate ahead. The switch that's on the right will make the bell that's on the far right side move vertically, while the one on the left will cause the bell that's in the middle to move horizontally. If you pull both switches down, then pull the one that's on the right back up, it'll make both bells move. There will be a bit of delay when you pull the switch before it stops moving, so a bit of trial and error will happen until you make it stop at the right spot, if you successfully position it correctly, the gate ahead will open and you'll find a silver chest containing a Knot of Rosary Rope - obtain the item, head back outside and climb up the ladder to head towards the next section.
Help Redento

In the next room, you'll come across multiple unstable platforms and Winged Face enemies. It's quite tricky to avoid them and at the same time to move quickly to avoid falling, so be careful.

Basically, you'll want to climb to reach the third level and ignore the room that's on the left side first. When you're at the top, climb up the ladder and you'll find yourself at the other end of Mountains of the Endless Dusk where Redento is (the path that's on the left will still be the mountains and connects to the other side of the Brotherhood of the Silent Sorrow), pull the switch and the platforms that are below will start to move, ride it to get to Redento and speak to him to obtain the Fourth Toe made of Limestone - along the way, you'll also find another Empty Bile Vessel and a trapped Moonlight child.
The Second Chain

When you're done, go back to the room where the Prie Dieu is and also the winged faces flying in between the broken ladders and make your back to far right side, only this time, you'll go down the ladder that's also on the right part of the room as indicated on the image above - this room will take you to the second statue that's holding the last chain that's bound onto the giant bell.

Now, climb down where you'll encounter another Winged Face and an Esquilon. Make sure to kill it first since whenever it hits its bell on the wall while you are clutched onto a wooden/metal wall, the impact will cause you to fall off. Head all the way to the bottom where you'll encounter x2 Sagittal Martyr, kill it, then climb to the top right. Watch out for the two Esquilon that's on the right and wait for it to try to hit the right side of the wall so that you won't fall off while climbing. Once you're at the top right, drop down towards them until you reach the bottom where you'll find another Collectible: Vertebra of Lindquist, the Foger - next, you'll see a ladder that leads to another section below that's on your right, make your way there first to open up a to find another item.

For this room, there's another woman ringing the bells and also another Winged Face, head towards the woman ringing the bell, kill her and pick up the Bouquet of Rosemary next to her - when you have the item, go back to the previous room, go to the top and climb the ladder to reach the next section of the area.

Next, go right where you'll see a couple of enemies here. Clear the area and continue going right where you'll find a ladder, climb to the top and you'll find another trapped Moonlight child and the 2nd statue holding the chains that's on the left side. Free the child, destroy the statue, then go towards the next room that's on the right before heading back to the main statue with the bell.
Obtain a Mea Culpa Heart

For this room, you'll need precision, timing, and patience in order to reach the other end where you'll find a Mea Culpa Heart. First, activate the switch ahead and the platform below it will start to move, the surfaces and platforms you'll need to use to get across will allow you to realize how to use it, it's just a matter of timing and patience to avoid falling into the spikes. Along the way, you'll also encounter a Winged Face and a trapped Moonlight child, and in the end, you'll find the Mea Culpa Heart: Heart of the Holy Purge.
Ring the Bell

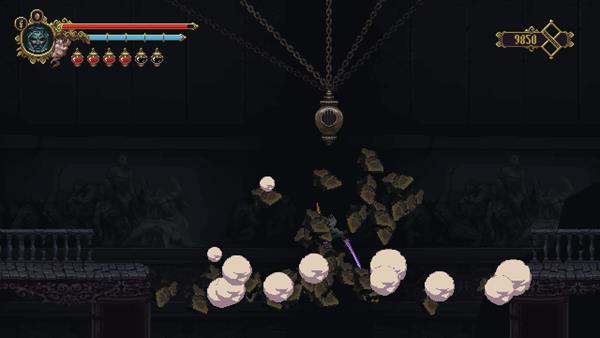
When you're done, go back and head towards the main statue and hit the bell. This will cause the floor underneath you to break and it will take you to the next location: Grievance Ascends - if ever you need to go back to Albero, there's a Portal Chapel that you can use at the west side of the Mountains of the Endless Dusk which leads to the other end of the Brotherhood of the Silent Sorrow.
Video
[video goes here]
Map
[map goes here]
Trivia & Notes:
Trivia and notes go here

So, there's no secret associated with the bell near the woman with the Bouquet of Rosemary?
1
+10
-1